For those of you who love making things yourself, you’ll love making Hemp milk! Its super easy, yummy, and nutritious. I decided to give hemp milk a try because cows milk gives me the tummy aches and I love making my own stuff, so it was a win win for me. I purchased a 13 oz. bag of raw shelled hemp seeds for around $10… yes hemp seeds are a bit expensive which is the only down side. But buying in larger quantities may help with the cost if you’re planning on making hemp milk long term. The only other items you need handy are a blender and a good sized amount of cheesecloth (for straining) or simply use a nut milk bag. This recipe even yields about 3/4 cup of Hemp Flour, which I will also tell you how to make from the remains of the milk. Follow my recipe and enjoy!
Disclaimer! NO, hemp seeds, hemp milk, or hemp flour with not make you high! There is little to no THC present in hemp products, as the THC is lost during hulling. Many brands will even label hemp products, pledging the product has undetectable levels of THC.
Ingredients
Makes about 4 cups of Hemp Milk; lasts 3-4 days in fridge
1 cup raw shelled hemp seeds
4 cups water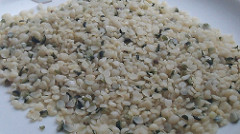
1 tablespoon of raw, unfiltered, unpasteurized, honey
Pinch of Himalayan sea salt
1/4 teaspoon pure vanilla extract
Method of Prep
- Place your raw shelled hemp seeds and room temperature water in a blender.
- Blend on high for about one minute. The milk should be a bit frothy when the blender stops and you should see small shell particles floating. You can pulse the blender a few more times to make sure its fully blended.
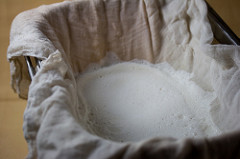
- Now take a good sized piece of cheesecloth, about 8 inches x 8 inches or larger, and loosely place the cheesecloth over the opening of the container, while securing it with a rubber band to hold it over the opening. This container is where your milk will be strained so make sure it is large enough to hold at least 4 cups of liquid.
- Pour the milk over the cheesecloth to strain the liquid from the left over shells. You may have to take your finger and move the shells around a bit to make the liquid strain easier and quicker.
- Once all the liquid is strained, carefully take the rubber band off to free the cheesecloth and grab the cheesecloth above the left over shells.
- Now, you will want to squeeze the remaining liquid in the shells by twisting the top of the cheesecloth and squeezing out all the liquid left in the shells. Make sure not to get any shells in the milk. Set that aside; this is what you will use to make the flour.
- Add the milk back into the blender and add the honey, salt, and vanilla. You can add a bit more honey if you want it sweeter.
- Blend on high again for another 30 seconds or so.
- Store the milk in a closed glass jar, large mason jars work nicely. Refrigerate and drink within 3-4 days! Enjoy!
Hemp Flour Recipe
So, instead of throwing the strained hemp seeds away from making the milk, the by product becomes hemp flour! You can use this in baking, granola, sprinkle it in cereal or yogurt, and use it as you would say ground flax seeds. This hemp flour is a great source of protein, fiber, and iron; so tossing it out would be a horrible mistake!
Here’s how to finish making it!
- Set your oven to 300 degrees F.
- Take the strained hemp seeds from the cheesecloth and place it into a pie tin for baking. Don’t throw away your cheesecloth, it can be reused. Just wash it and let it dry then reuse!
- Place the pie tin in the oven for about 10-15 minutes, making sure to stir it half way through.
- Let it cool, and store in dry storage in an air tight container until use.
This method makes for a pretty course and slightly lumpy hemp flour, which could be ran through a food processor to make it finer. Its all up to your personal preference and what you intend to do with it!